Building a Mono Stringer Stairway

I’ve built a few modern looking mono stringer stairways and here’s a post on how it usually goes. The stairs I’ve done have had different ways of attaching the treads, but they’re all similar.

First I make a CAD model of what needs to be built. The mono stringer is a 5″ x 5″ x 1/4″ square tube with 1/4″ plate tread brackets welded to it.

Welding all the tread brackets to one side of the tube caused it to bow nearly 2″ in the middle! I bent the tube back straight by heating the other side to cherry red with an acetylene torch at every tread weld.

Next the stringer was bolted to the concrete slab and lagged to the wall.

The treads were attached to the tread brackets from the underside with countersunk Simpson Timber Screws.

Finally the railing was fabricated in sections that attach together with countersunk machine screws for a flush look.

Building a 7′ Wall Clock

Recently I was tasked with building a 7′ wall clock at a property management company and here’s how I did it. I’ve never built a clock before, so there was a fair amount of research to determine what clock motor to purchase that could run such long hands. Eventually I settled on a C1MI-G1 from Electric Time Company.

A drawing of the clock to be made The dial markers are made from aluminum tubing with the ends capped off.

The first step was to cut a square hole in the brick wall and install the motor housing. It is held in place with masonry screws and two cans of expanding foam. It’s important that it is aligned with the face of the wall so the motor shaft will be perpendicular.

Next I laid out the locations for the dial segments with painters tape. The segments have 3/8″ bars welded to the backside which get epoxied into holes drilled in the brick.

The hole locations are critical, so I built a layout tool to mark the holes. The tool slips over the motor shaft and I used a digital level to find 0º, 30º, and 60º,

After the holes were drilled I epoxied the dial segment pieces in place. I used the digital level again to make sure they are tipped at the right angle.

The hands are made from 1/8″ aluminum. I TIG welded an aluminum “box” at the end to hold enough lead to balance them. The minute hand needed 8 pounds and the hour hand 5 pounds.

The counterweights were so thick that there was less than 1/4″ clearance once they were mounted on the motor shafts

The dial segments epoxied into the hole in the brick.

The final product!


Building Curved Railings

I’ve been making straight railings for years now, but I’ve finally been commissioned to make a curved set. The main challenge to overcome is accurately measuring where they should go, and then building them to close enough tolerances that they’ll fit. There’s also a curved stairway which presents its own problems. As the rail curves the horizontal bars also need to twist, otherwise they will be at a weird angle by the time you get to the bottom of the stairs. In boat building it would be like cutting a rolling bevel.

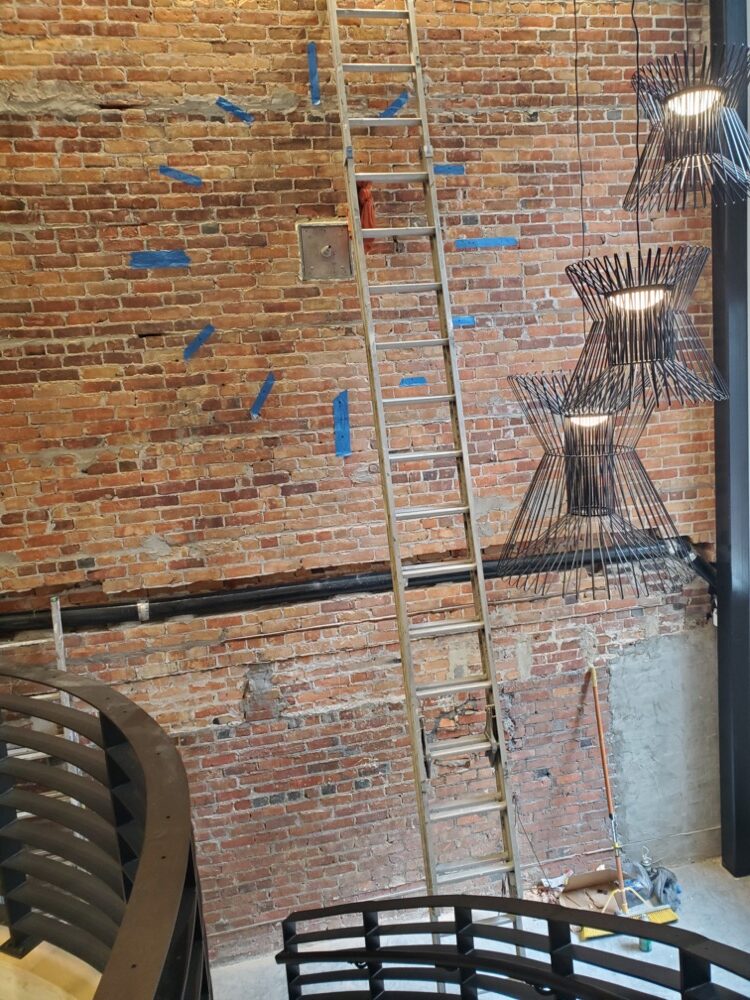
When I got there the old railing had been removed. I will need to make a semicircular rail to the left of the stairs, and a long gentle “S” shaped one to the right. Then there is a transition point where the rail will begin going down the curved steps.

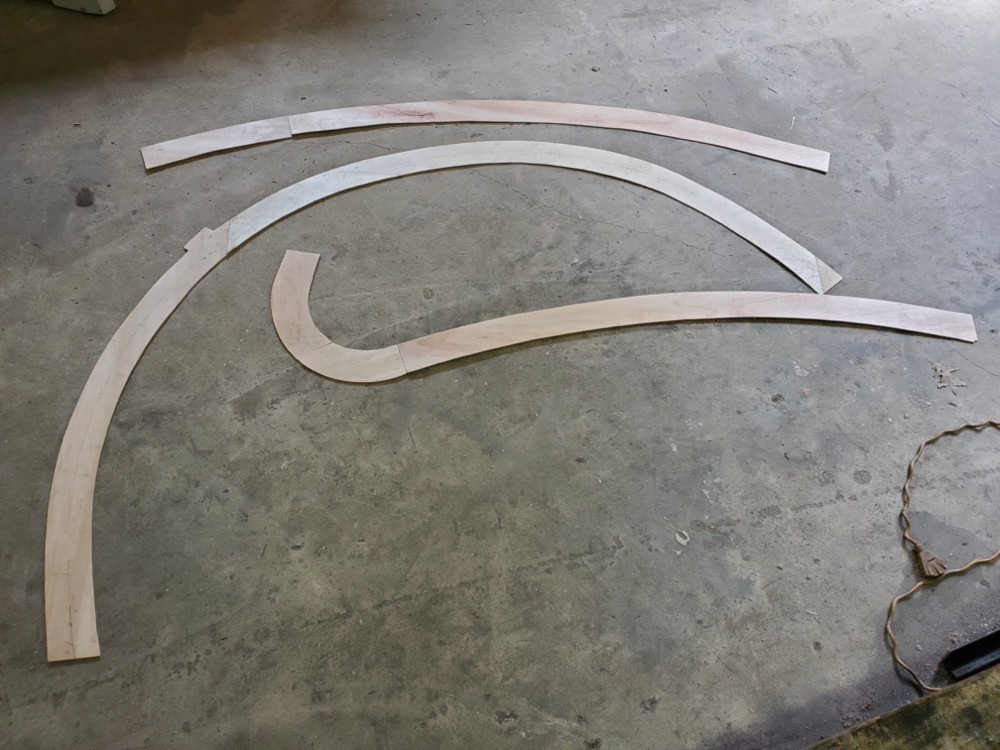
Usually I like to measure things like decks and stairs, but in this case I decided 1/4″ Luan templates were the best solution. There’s no good way to accurately measure the curves and I don’t have any 3d scanning tools to build a CAD model accurate enough to design from.

Next I converted my templates into CAD files to be cut out on my CNC plasma cutter. First I drew a line down the center of my templates and then measured an X and Y point every 5″ . Then I could plot the points in CAD, connect them with a fair curve, and then offset that curve 1.5″ to make the 3″ wide bars that I needed. I figured it’s easier to cut the curves out than try to edge set 1/4″ x 3″ flat bar.

Then I could build the railing section directly on top of my template to ensure it will fit.

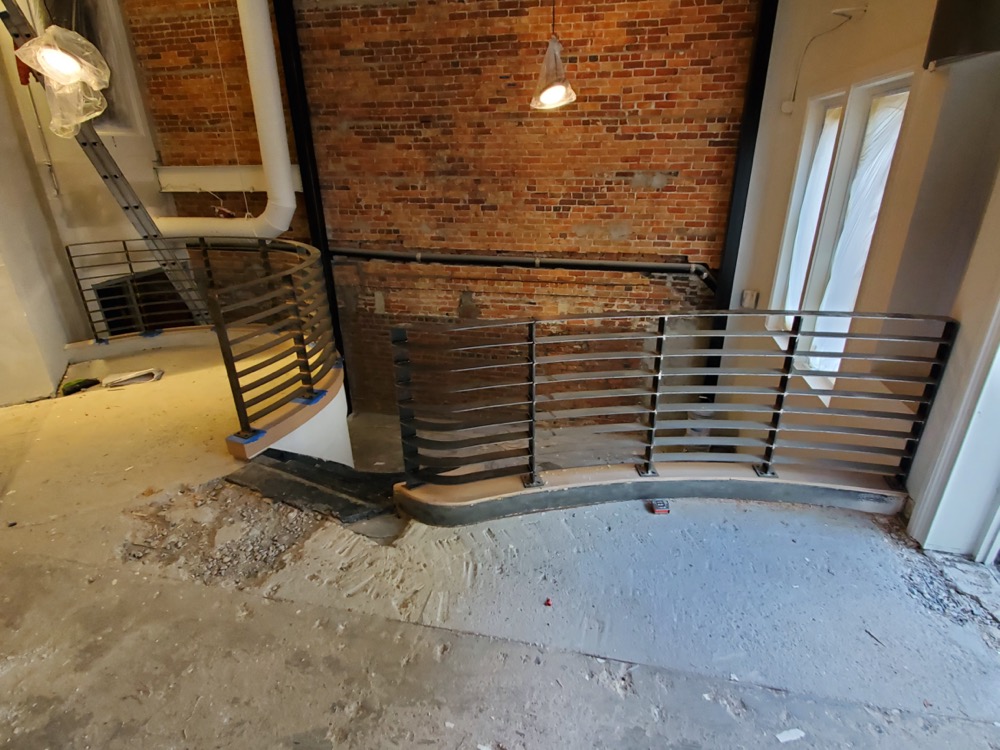
The two horizontal sections were fairly easy to build and they fit with little trouble. The semicircular section is fastened to the short concrete wall with lead anchors, while the gentle “S” rail bolts to tapped holes in the existing steel C channel.

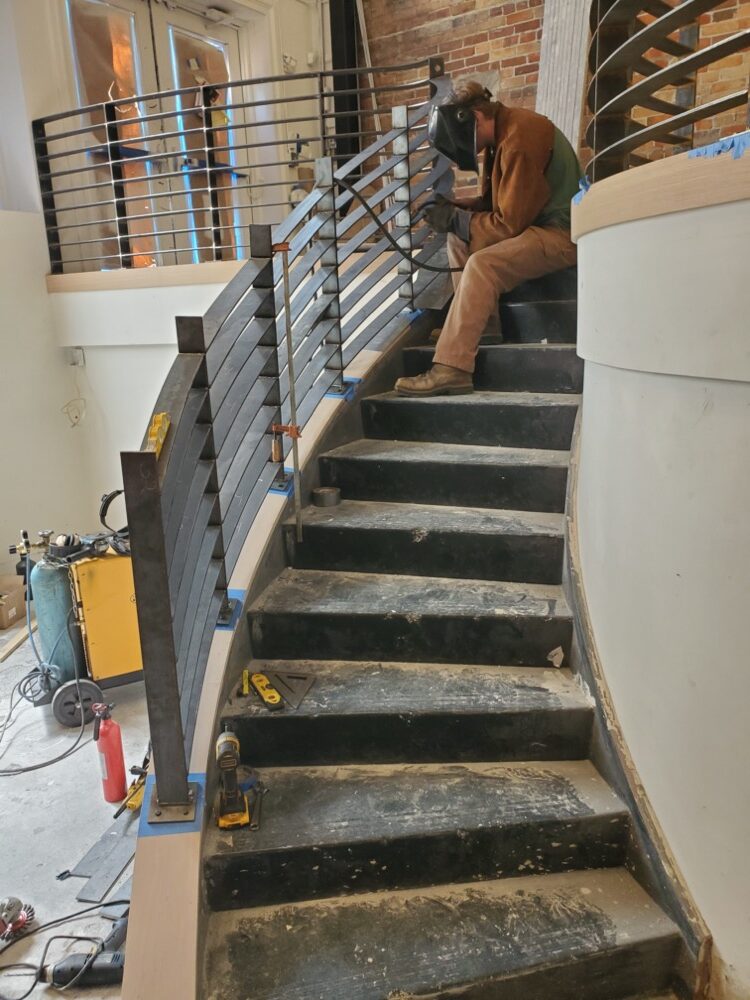
The stair section was the trickiest to complete since it had to be built in place. I cut the horizontal pieces on the CN?C plasma cutter but had to trim them in the field with an angle grinder. The posts were plumbed and the trimmed so that they matched the angle of the feet. I also twisted the horizontal pieces as I welded them in to try and keep them flat.

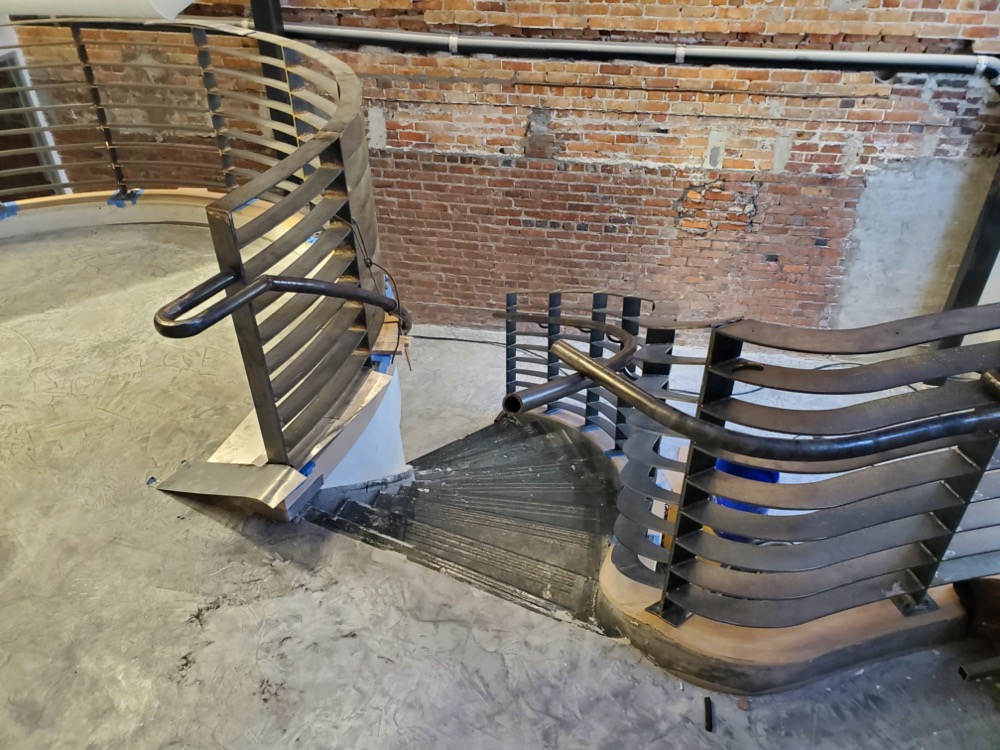
After the guard rails were finished I built some 1-1/2″ hand rails. I plotted the curve they needed to follow on a piece of Luan and then bent the pipe with an acetylene torch every 6″. Most of this was done at my shop, but the transition between horizontal and the stairs had to be done in the field.

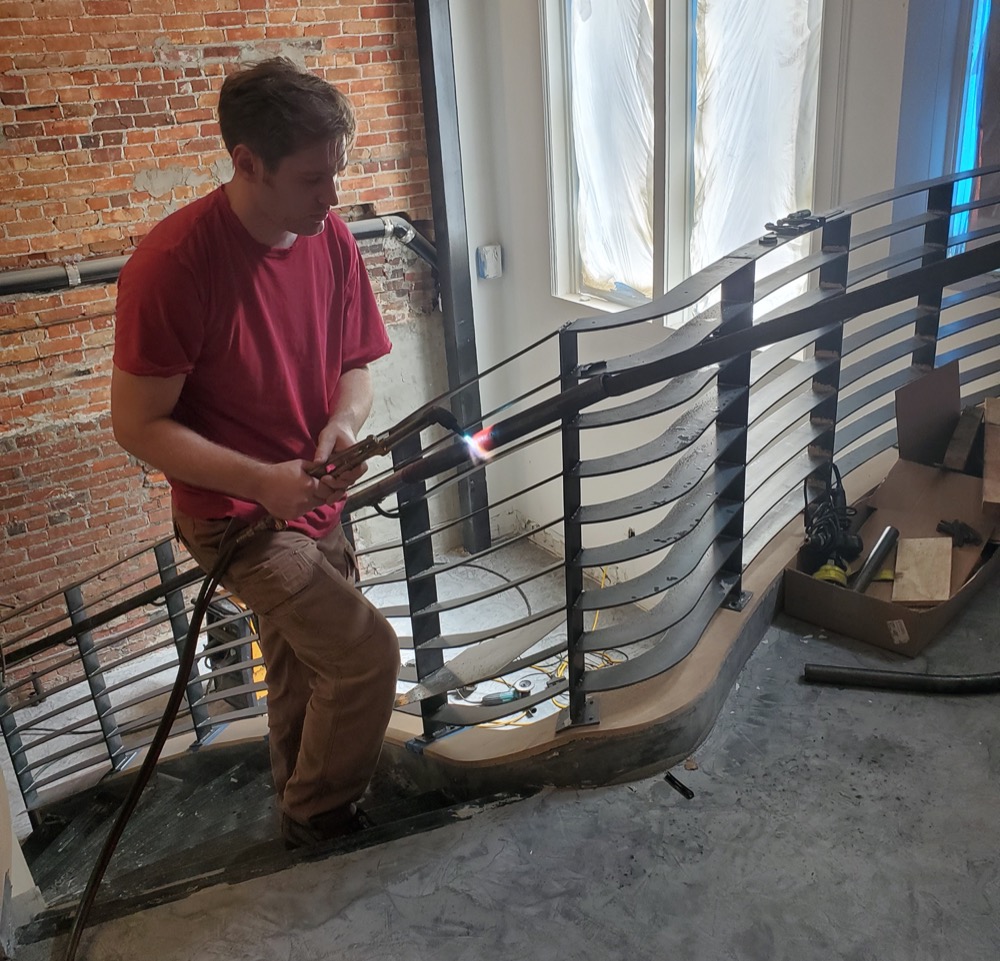
Heating the pipe to cherry red so it can be incrementally bent around the curve. The handrail brackets were welded onto the railing and screwed to the handrail with self tapping screws.

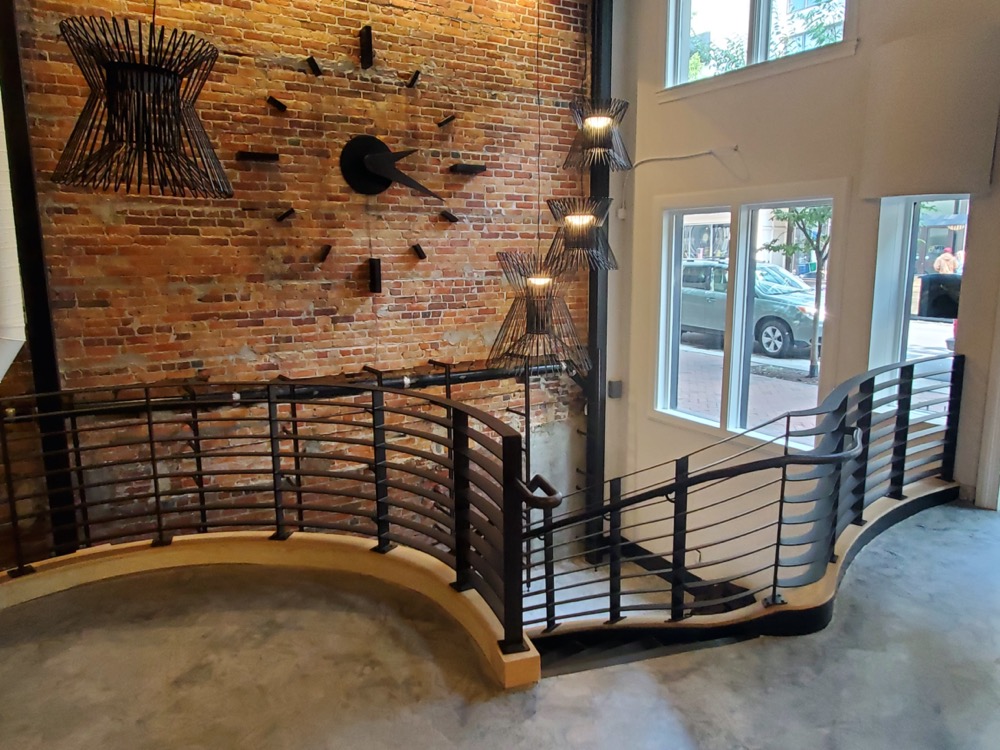
After everything was welded and confirmed to fit, I took it all out to be powder coated.

Reinstalled after powder coating! The railing sections and handrails attach with countersunk bolts for a seamless look.

This was certainly the most challenging railing project I’ve done yet.


Building a Cantilevered Stairway

The first complicated job I did after setting out on my own was a set of cantilevered stairs.

Here’s a CAD model of what needs to happen. A C channel gets attached to the wall, tread supports get bolted to the channel, and railing gets fastened to the tread supports. There’s also a separate landing assembly that bridges over the stairwell to the basement.

First the C channel was lagged to the beams in the wall.

Then the tread supports were bolted to the channel. These were shimmed as needed so they were all perpendicular to the wall.

Then the railing was attached. I built the stair section in one piece based off measurements and thankfully it fit perfectly. The vertical posts attach to the tread supports with a half lap and countersunk bolts for a completely flush joint.

Later I installed the landing handrail and the basement stairwell rail.

A view from downstairs.